How to Use your PASS+ Gallery
I use an application called PASS to share your final images. These galleries are so beautiful and easy to use, however, there are a lot of options available. If you are feeling overwhelmed by your first experience with PASS galleries, this guide is for you.
Viewing Your Images
First things first, your PASS gallery is simply a website; a URL. Therefore, you can view your photos on any device. Just open the gallery link on your desired device using the instructions below:
1. Open your gallery by clicking the link in the email I sent you.
2. Sign in with your email address – this allows you to mark your favorite images.
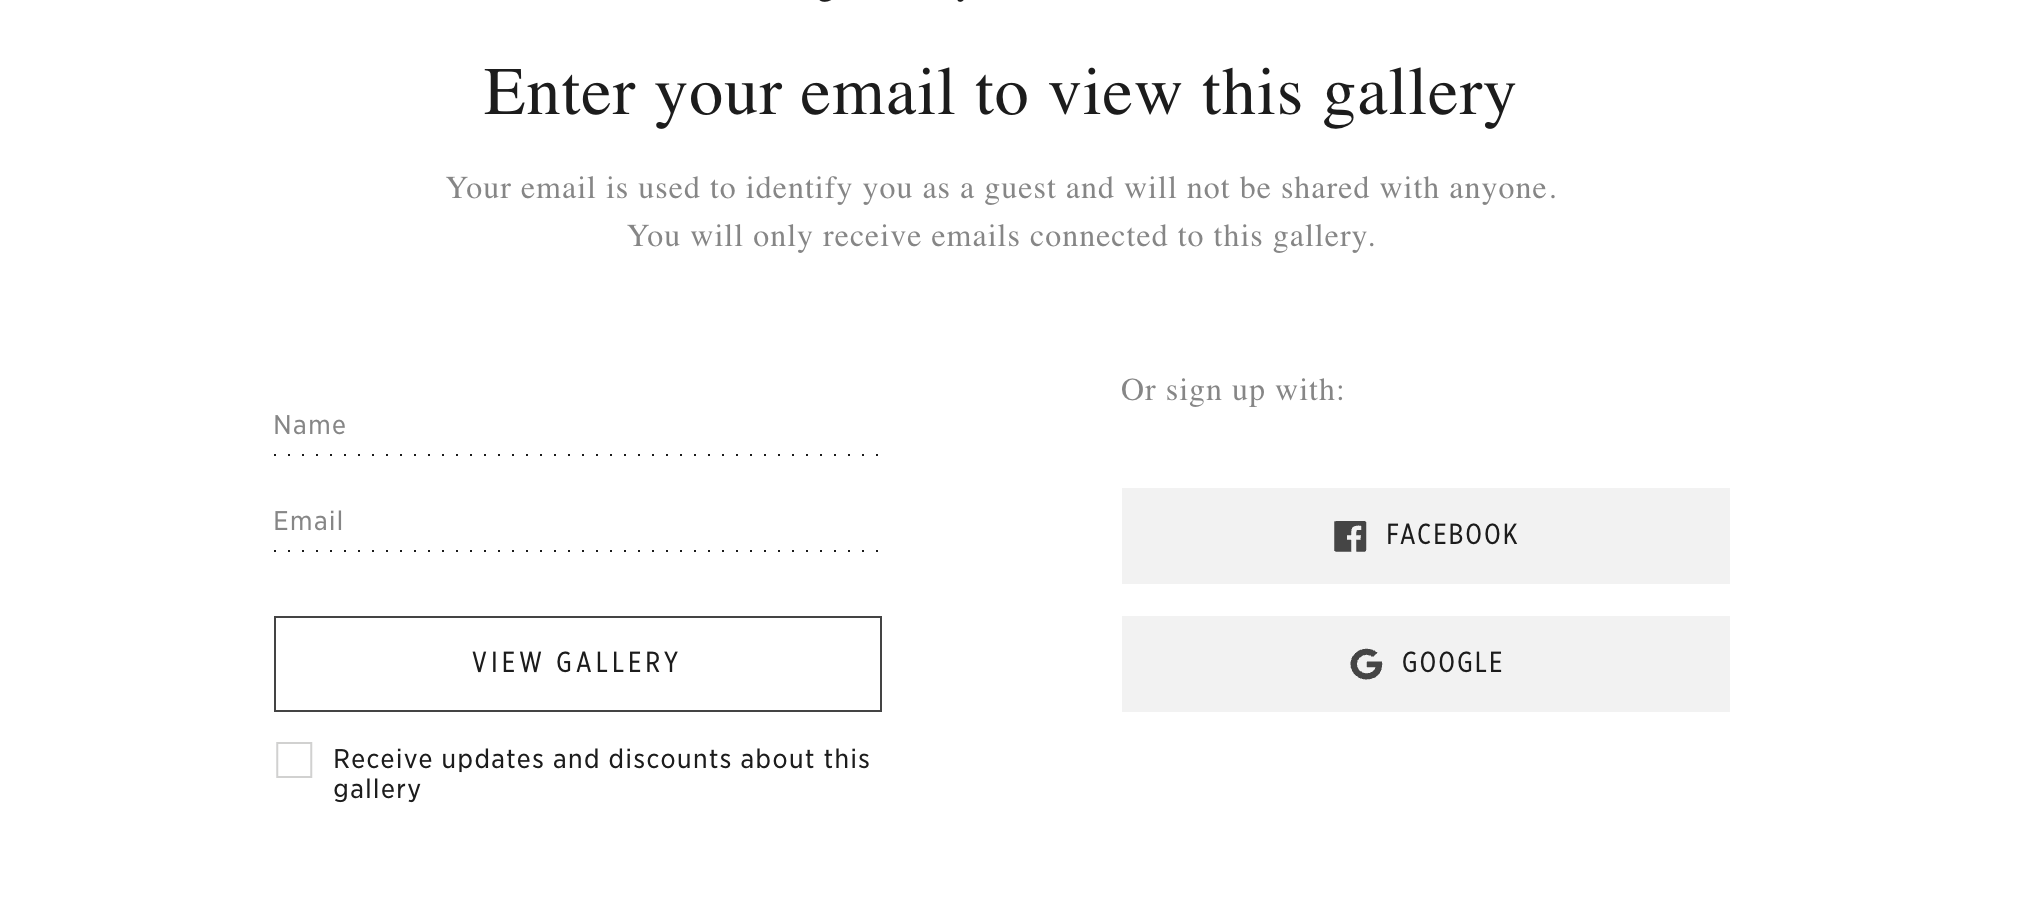
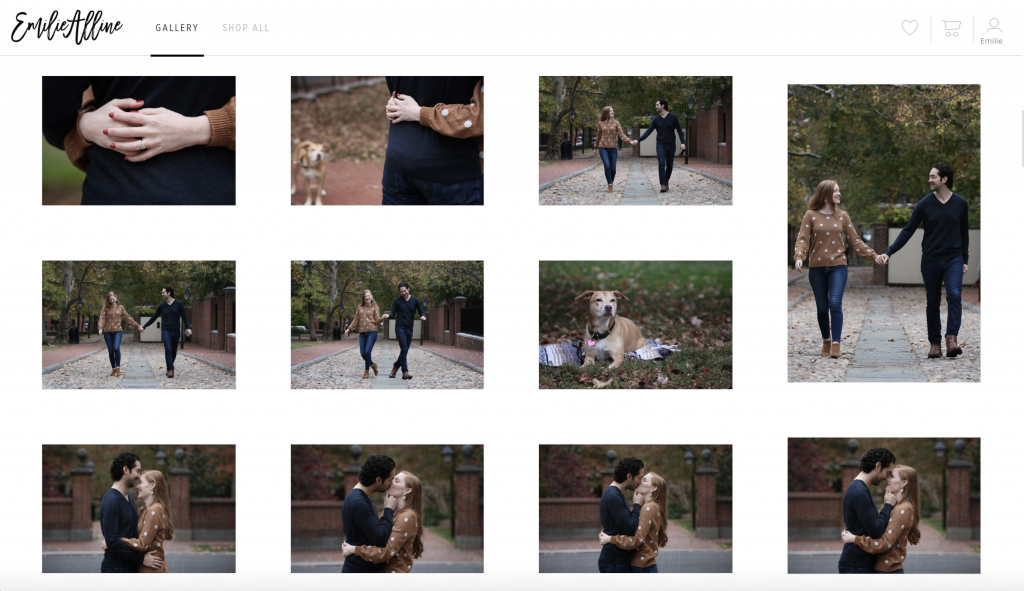
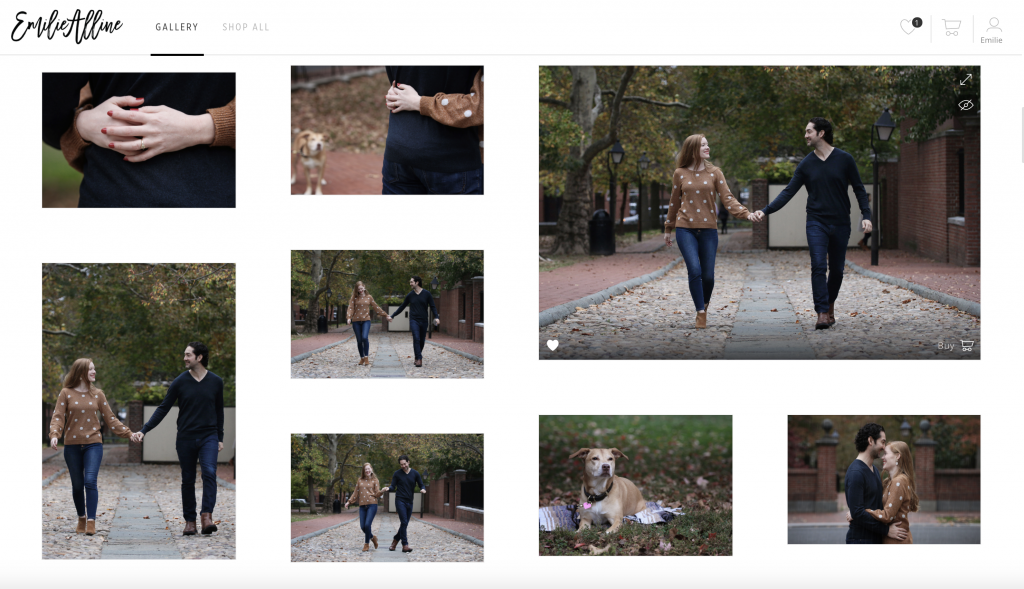
3. Start scrolling down to see all your images – you can click on an image to view it larger.
Selecting Your Favorite Images
If you want to mark your favorite images, click the heart icon. There are a couple of ways to do this:
1. While viewing the gallery, hover over an image you want to favorite. Some icons will pop up at the bottom of the image. Click the heart OR
2. Click on an image to view it full screen. Then, click the heart at the bottom of the image.
Downloading Images
DOWNLOADING ALL IMAGES
1. Click the download icon (arrow pointing down) at the top right corner of the gallery.
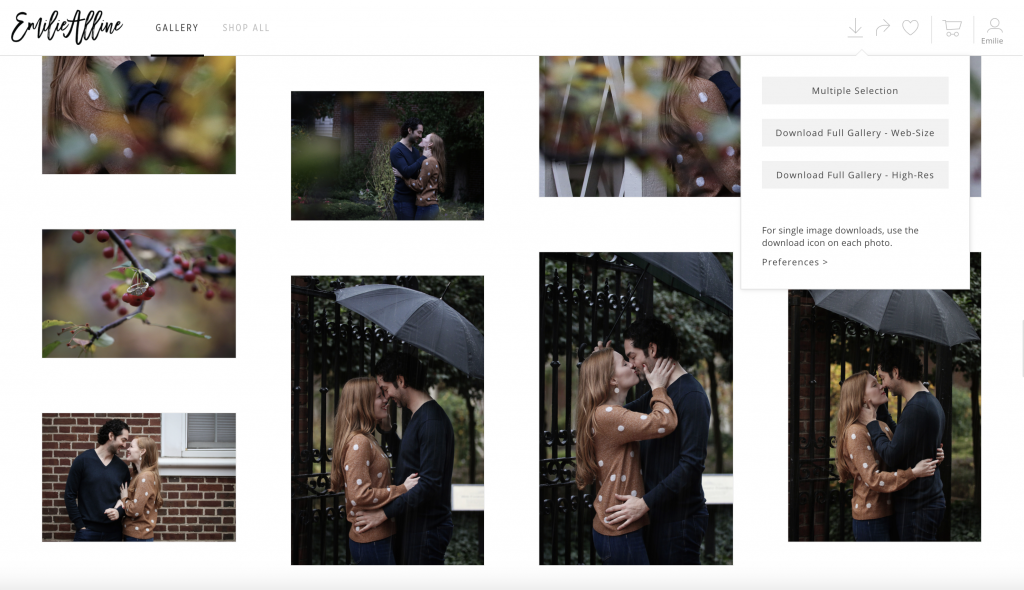
2. Select an option. You have three choices here:
Multiple Selection: Will allow you to check the specific photos you want to download, letting you download all your favorites at once
Download Full Gallery – Web-Size: Download all photos in the gallery in a smaller resolution optimized for blogging
Download Full Gallery – High-Res: Download all photos in the gallery in full, high-resolution, for printing purposes
3. Select whether you want the folder of images to save to your computer or Dropbox.
4. Click the .zip file link to download it.
5. Once the .zip file downloads to your computer, open it, and select Extract All. This will save all the images in your gallery to your computer.
DOWNLOADING ONE IMAGE AT A TIME
1. Hover over an image you want to download
2. Click the download icon (it looks like an arrow pointing down). This will add the photo to a download queue.
3. If you want to download multiple images, continue clicking the download icon for any other images you want.
Ordering Prints
One of the best parts of PASS is it allows you to order professional-grade prints and products directly from your gallery. No more downloading just to re-upload to another site! These prints or products will be produced by a professional print shop and shipped directly to your doorstep!
To order prints or products, follow the instructions below:
1. Hover over or click on the image you want to print and click Buy in the bottom right corner of the image.
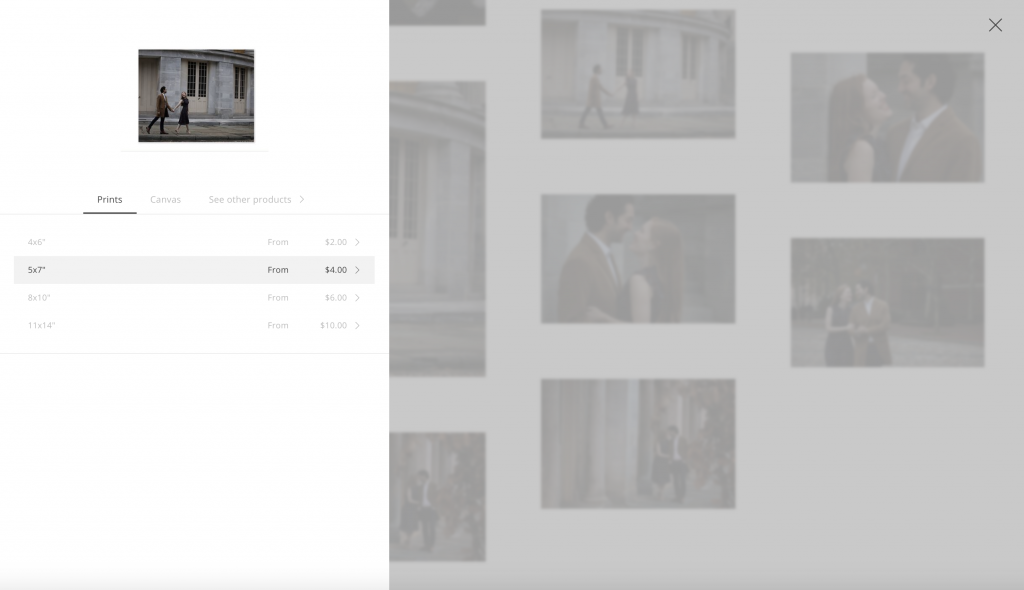
2. From the fly-out on the left, select the products or prints you want of the image.
3. Enter the quantity you want to order.
4. Click Add to Cart.
5. Once you have chosen all the pictures you want to print, click the shopping cart in the top right-hand corner of the gallery. There will be a number next to it indicating how many products you are ordering.
6. Edit your address if it is not already there.
7. Click Place your Order.
8. Enter payment information.
Sharing your Images
To share the images with friends and family, I suggest sending the link/URL to your gallery.
I recommend not using the Share Photo button on social media, because it will share the photo and post your entire gallery link, which you may not want to do.
Enjoy your images! Feel free to email me with any questions or concerns.